Stability AI公式ブログで興味深い記事がリリースされました。
https://stability.ai/news/stable-diffusion-3-medium-fine-tuning-tutorial
https://ja.stability.ai/blog/stable-diffusion-3-medium-fine-tuning-tutorial
以下、AICU mediaによるAI+人力翻訳、前半をかなり圧縮しつつ2万字超えでお送りします。
はじめに
こんにちは!Stability AI の生成メディアソリューションエンジニア(およびフリーランスの 2D/3D コンセプトデザイナー)の Yeo Wang です。YouTube で私のビデオを見たことがあるかもしれませんし、コミュニティ(Github)を通じて私を知っているかもしれません。個人的には、SD3 Medium をトレーニングしたときにまともな結果が得られたので、完全なファインチューニングと LoRA トレーニングの両方について、いくつかの洞察とクイックスタート構成を共有します。
対象読者: ファインチューニングに関する基本的な知識を持つエンジニアまたは技術者
目的: SD1.5/SDXL と Stable Diffusion 3 Medium (SD3M) のファインチューニングの違いを理解し、より多くのユーザーが SD3M でファインチューニングできるようにする
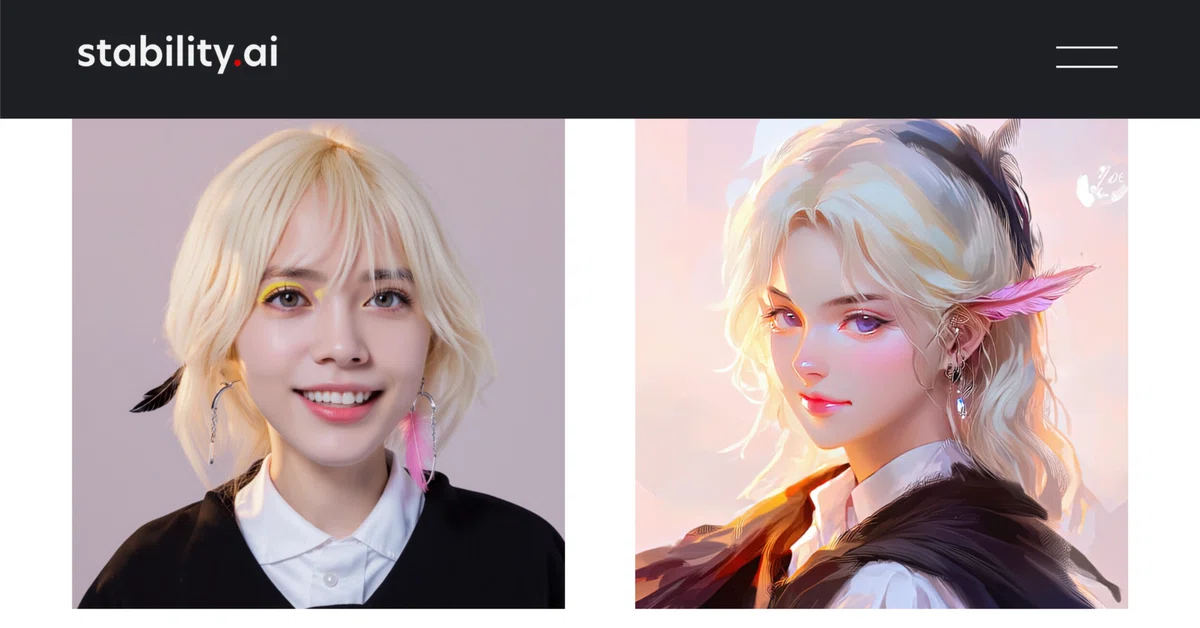
SD3 のような画像を生成することに興味がありますか?
<3つのプロンプトと、ベースモデルとファインチューンモデルによる出力画像の例>
詳細については、このリンクから続きをお読みください。
また、おまけとして、近日公開予定の画像モデルをこっそり紹介します~🙂
Yeo Wangさんの熱心な動画と情報密度
以上のように非常に軽いノリで紹介された短いブログの先には、 Stability AI による膨大な notionページがありました。
また紹介されているKasukanraさんのチャンネルには Stable Diffusionの解説動画だけでなく、FLUX.1[dev]によるLoRAの解説動画などもあります。

https://www.youtube.com/@kasukanra
kasukanraさんのチャンネルはイラストレーションを題材にした話題は多いですが、商用キャラクターの模倣や二次創作が多く扱われているわけではないことに注目です。そして非常に情報量が多い!動画も非常に濃密で「倍速で飛ばしてみる」というより「止めてみる動画」という印象です。


notionに書かれた情報から
さて、notionに書かれた情報を読み解いていきます。
Ubuntu環境におけるComfyUIを使ったSD3のファインチューニングに関する情報が、投入するコマンドから学習レート、コンフィグファイルの設定まで細かく記載されています。
【ご紹介】SDXL時代のLoRAやファインチューニングに関する基礎知識についてはぜひSD黄色本「画像生成AI Stable Diffusionスタートガイド」をご参照ください。
前半はUbuntuでの環境面と「SimpleTuner」のインストールですが、「カスタムコンフィグに戻る」以降の「SimpleTunerでキャプションのドロップアウト機能を使うのと、シャッフルをシミュレートするのとでは、何か違いがあるのでしょうか?」という話題以降が読みごたえがあります。
In addition, there is a repeats parameter that you may or may not be familiar with depending on whether or not you’ve used other training repositories before.
repeats duplicates your images (and optionally rotates, changes the color, etc.) and captions as well to help generalize the style into the model and prevent overfitting. While SimpleTuner supports caption dropout (randomly dropping captions a specified percentage of the time),it doesn’t support shuffling tokens (tokens are kind of like words in the caption) as of this moment, but you can simulate the behavior of kohya’s sd-scripts where you can shuffle tokens while keeping an n amount of tokens.
If you’d like to replicate that, I’ve provided a script here that will duplicate the images and manipulate the captions:
さらに、以前に他のトレーニングリポジトリを使ったことがあるかどうかによって、馴染みがあるかどうかが分かれるかもしれないrepeatsパラメータがあります。repeatsは、モデルにスタイルを一般化し、オーバーフィッティングを防ぐために、画像(オプションで回転、色の変更など)とキャプションを複製します。SimpleTunerはキャプションのドロップアウト(指定した割合でランダムにキャプションをドロップする)をサポートしていますが、現時点ではトークン(トークンはキャプションの単語のようなもの)のシャッフルはサポートしていません:
<以下AICU mediaが解説しながら読みやすく翻訳します>
★以下、「私」はYeo Wangさんもしくはnotion著者の言となります。
しかし、kohyaのsd-scriptsの動作をシミュレートすることができます。この場合、n個のトークンを保持しながら、トークンをシャッフルすることができます。
もしそれを再現したいのであれば、画像を複製してキャプションを操作するスクリプトをここに用意しました:
import os
import shutil
import random
from pathlib import Path
import re

def duplicate_and_shuffle_dataset(input_folder, output_folder, dataset_repeats, n_tokens_to_keep):
    # Create output folder if it doesn't exist
    Path(output_folder).mkdir(parents=True, exist_ok=True)

    # Get all image files
    image_files = [f for f in os.listdir(input_folder) if f.lower().endswith(('.png', '.jpg', '.jpeg'))]

    for i in range(dataset_repeats):
        for image_file in image_files:
            # Get corresponding text file
            text_file = os.path.splitext(image_file)[0] + '.txt'

            if not os.path.exists(os.path.join(input_folder, text_file)):
                print(f"Warning: No corresponding text file found for {image_file}")
                continue

            # Create new file names
            new_image_file = f"{os.path.splitext(image_file)[0]}_{i+1}{os.path.splitext(image_file)[1]}"
            new_text_file = f"{os.path.splitext(text_file)[0]}_{i+1}.txt"

            # Copy image file
            shutil.copy2(os.path.join(input_folder, image_file), os.path.join(output_folder, new_image_file))

            # Read, shuffle, and write text file
            with open(os.path.join(input_folder, text_file), 'r') as f:
                content = f.read().strip()

            # Split tokens using comma or period as separator
            tokens = re.split(r'[,.]', content)
            tokens = [token.strip() for token in tokens if token.strip()]  # Remove empty tokens and strip whitespace

            tokens_to_keep = tokens[:n_tokens_to_keep]
            tokens_to_shuffle = tokens[n_tokens_to_keep:]
            random.shuffle(tokens_to_shuffle)

            new_content = ', '.join(tokens_to_keep + tokens_to_shuffle)

            with open(os.path.join(output_folder, new_text_file), 'w') as f:
                f.write(new_content)

    print(f"Dataset duplication and shuffling complete. Output saved to {output_folder}")

# Example usage
input_folder = "/weka2/home-yeo/datasets/SDXL/full_dataset_neo"
output_folder = "/weka2/home-yeo/datasets/SDXL/duplicate_shuffle_10_fantasy"
dataset_repeats = 10
n_tokens_to_keep = 2

duplicate_and_shuffle_dataset(input_folder, output_folder, dataset_repeats, n_tokens_to_keep)
ph070, A rainy urban nighttime street scene features two cars parked along the wet pavement. The primary subject is a sleek, modern silver car with streamlined curves and glistening wheels reflecting the rain-soaked road. The background includes another vehicle—a darker sedan—partially obscured. Illuminated signs with Asian characters suggest a city setting possibly in a bustling nightlife district. The style is distinctly cinematic with a futuristic, neo-noir aesthetic, characterized by moody blue tones and the reflective glow of wet surfaces. The streetlights and the occasional gleam of neon green and orange provide contrast, enhancing the dark ambiance of the city at night. The atmosphere evokes a sense of mystery and quiet anticipation, with the deserted street hinting at hidden stories or events about to unfold.
では、SimpleTunerでキャプションのドロップアウト機能を使うのと、シャッフルをシミュレートするのとでは、何か違いがあるのでしょうか?
「ファンタジー・アート」データセットの場合、「キャプション・ドロップアウト」の方が、シャッフリングに比べて、データセットのスタイルをより保つことができると感じた。「Cinematic photo」データセットの場合、キャプションのドロップアウトとシャッフリングの両方の方法は互換性があると感じた。両者について明確な結論を出すことはできなかった。
とりあえず、`multibackend.json`ファイルで `repeats` の数を `10` に設定し、`config` でキャプションのドロップアウトを `0.25` に設定することで、`repeats` を使う(そしてキャプションをドロップアウトする)ほうに傾いた。
★訳注:残念ながら「datasets/SDXL/full_dataset_neo」についての提供はないようですが、貴重なデータセットについての情報があります。
さらに、データセットについてもう少し詳しく触れておきたい。fantasy art` データセットの場合、解像度が `1024 x 1024` ピクセルの正方形の画像で構成されている。一方、 `cinematic photo` データセットにはあらゆる種類のアスペクト比/解像度があった。私の `multibackend.json` ではトリミングを無効にしている。ある種のヒューリスティックな方法(例えば私のdetect_utils.py)を使ってプリクロッピングを行うことを強くお勧めします。そうでない場合は、`multibackend.json`のオプションの一つを使う必要があります:
“jsx “crop_style”:”random|center|corner”, “crop_aspect”:「正方形|保存”, “`
これらは、想定される関心領域に焦点を合わせるのが難しく、理想的ではないようだ。いずれにせよ、デフォルトの `config` でも、私のカスタム `config` でも、トリミングは `false` に設定されているので、私が気にしたことではない。
ステップの計算
最大学習ステップ数は簡単な数式で計算できます(単一コンセプトの場合):

最大学習ステップ数 = (サンプル数 x 繰り返し / バッチサイズ)x エポック
- バッチサイズ:1イテレーション(繰り返し)のなかで処理されるサンプル数
- サンプル数:データセット内の総サンプル数
- 繰り返し回数:何回1エポックでデータセットを繰り返すか
- Epochs:データセット全体を処理する回数
例えばここで「fantasy art」データセットには476枚の画像があるとします、ultibackend.jsonの10回の繰り返しに追加する。train_batch_size`を`6`にした。こういう設定の理由は2つあります。
(1)この値なら、プログレスバーが1秒か2秒ごとに更新されるのを見ることができる。 1回の反復で`6`のサンプルを取ることができるという点で十分な大きさであり、トレーニングの過程でより多くの汎化を行うことができる。
もし私が30エポックとか欲しいなら、最終的な計算はこうなる:

これは多かれ少なかれ「23,800ステップ」に相当します。
括弧の中の部分「476 x10 / 6」は1エポックあたりのステップ数を表し、793です。
CHECKPOINTING_STEPS と MAX_NUM_STEPS はそれぞれ 800 と 24,000 に切り上げられます。
CHECKPOINTING_STEPS はモデルのチェックポイントを保存する頻度を表します。これを800に設定すると、1エポックにかなり近いので、問題ないと思われます。CHECKPOINTING_LIMITは、以前のチェックポイントを上書きする前に保存したいチェックポイントの数です。私の場合、すべてのチェックポイントを保存しておきたかったので、`30`のような高い数値に制限を設定しました。
複数のコンセプト
上記の例では、頭に1つの統一的なトリガーワード `k4s4` を持つ単一の概念で学習しています。しかし、データセットに複数の概念/トリガーワードがある場合、ステップの計算は以下のようになります:
2コンセプトの場合、ステップの計算式は以下のようになります。

iコンセプトの場合

最後に学習率ですが、これ以上高くすると勾配が爆発してしまうので「1.5e-5」としています。

これで重要な設定はほとんどカバーできる。
★訳注:質を高めるために変更できる追加設定がいくつかありますので、カスタム設定をご参照ください。
検証画像を生成する頻度は VALIDATION_STEPS で設定する。私は800(私のデータセットのエポックのステップ数)の1/4である200に設定した。つまり、1/4エポックごとに検証画像を生成することになる。正気度をチェック(sanity check)するために、少なくとも半分のエポックごとに検証画像を生成することをお勧めする。そうしないと、エラーを素早く発見できないかもしれない。
LR_SCHEDULEとLR_WARMUP_STEPS
最後に`LR_SCHEDULE`と`LR_WARMUP_STEPS`、
この場合は`cosine`スケジュールで行いましたが、こんな感じになります。


SimpleTunerはデフォルトのウォームアップを全トレーニングステップの10%に設定している。ここは変更しない。
★訳注:Custom SD3 full config.env についても公開されています。
実際にトレーニングを開始する
これで `config.env` と `multibackend.json` が適切にセットアップされたので、いよいよトレーニングを実行する。これはルートディレクトリで
bash train.shで実行します。
計算能力に関する考察
上記の実験はクラウドコンピューティングを使って行いましたが、私が提供した`config.env`は、24GBのVRAM GPU(`RTX 4090`)を使った私の個人的なマシンにて(かろうじて)可能です。


モデルをどうするか?
デフォルトでは、トレーニングが完了すると、以下のようなフォルダ構造になります。

ここで理解しておくべきことがいくつかあります。
- datasets/models`内の各`checkpoint`ディレクトリにある`diffusion_pytorch_model.safetensors`ファイルが必要です。このファイルの場所は、transformerディレクトリの中です。見ての通り、これはかなり複雑です。最終的なパスは次のようになります: weka2/home-yeo/simpletuner_models/ninth_run/datasets/models/checkpoint-2400/transformer/diffusion_pytorch_model.safetensors` .
- diffusion_pytorch_model.safetensors`ファイルは、`ComfyUI`の`Load Checkpoint`ノード内で使用すると動作しません。UNETローダー`を使用するか、新しいバージョンの`ComfyUI`では、`Load Diffusion Model`ノードを使用する必要があります。そのため、これらのモデルを `ComfyUI` の models ディレクトリ内の `unet` ディレクトリにコピーする必要があります: admin/home-yeo/workspace/ComfyUI/models/unet`のようにします。
これらのモデルを必要な場所に配置するプロセスを効率化するために、`source`と`target`ディレクトリの両方を指定すると、私が書いたシェルスクリプトがこれをやってくれます。
SOURCE_DIR` と `TARGET_DIR` を置き換えて、モデルを `unet` フォルダに `symlink` します。
#!/bin/bash

# Source directory where the models are stored
SOURCE_DIR="/admin/home-yeo/workspace/simpletuner_models/sd3_medium/full_finetune/cinema_photo/03/datasets/models"

# Target directory for symlinks
TARGET_DIR="/admin/home-yeo/workspace/ComfyUI/models/unet/simpletuner_blog_cine_photo_03"

# Iterate over each checkpoint directory
for CHECKPOINT_DIR in $(ls -d ${SOURCE_DIR}/checkpoint-*); do
    # Extract the checkpoint number from the directory name
    CHECKPOINT_NAME=$(basename ${CHECKPOINT_DIR})

    # Define the source file path
    SOURCE_FILE="${CHECKPOINT_DIR}/transformer/diffusion_pytorch_model.safetensors"

    # Define the symlink name
    LINK_NAME="${TARGET_DIR}/${CHECKPOINT_NAME}.safetensors"

    # Check if the source file exists
    if [ -f "${SOURCE_FILE}" ]; then
        # Create a symlink in the target directory
        ln -s "${SOURCE_FILE}" "${LINK_NAME}"
        echo "Symlink created for ${CHECKPOINT_NAME}"
    else
        echo "File not found: ${SOURCE_FILE}"
    fi
done

echo "Symlinking complete."
https://note.com/api/v2/attachments/download/9d30fb4c541e9cd984f438650e9b5db0
https://note.com/api/v2/attachments/download/0c7b9738a3800c72eeb35a479839d54e
ベストチェックポイントの決定
最適なチェックポイントを決定する方法は、特定のプロンプトのチェックポイント番号をX軸にプロットする。つまりこんなかんじ。


これを行うために、私はComfyUIワークフローのAPIバージョンをロードするカスタムスクリプトを使用しています。保存(API形式)ボタンをクリックすれば、どんなワークフローでもAPI形式で保存できる。私はすでにあなたの使用のために上のバージョンを保存しました。もしComfyUI APIの使い方についてもっと詳しいビデオガイドが必要であれば、昨年作った動画がここにあります。
ComfyUIが起動していることを確認してから、以下のスクリプトを実行する。また、スクリプトを実行する場所と同じ場所に`.env`ファイルをセットアップする必要があります。
import os
import json
import random
from urllib import request
import datetime
from PIL import Image, ImageDraw, ImageFont
import time
import re
import urllib.error

from dotenv import load_dotenv
load_dotenv()

# Configuration
api_workflow_dir = os.getenv("API_WORKFLOW_DIR")
finetune_dir = os.getenv("FINETUNE_DIR")

api_workflow_file = os.getenv("API_WORKFLOW_FILE")
api_endpoint = os.getenv("API_ENDPOINT")
image_output_dir = os.getenv("IMAGE_OUTPUT_DIR")
font_ttf_path = os.getenv("FONT_TTF_PATH")

comfyui_output_dir = os.getenv("COMFYUI_OUTPUT_DIR")

api_endpoint = f"http://{api_endpoint}/prompt"

workflow_file_path = os.path.join(api_workflow_dir, api_workflow_file)
workflow = json.load(open(workflow_file_path))

current_datetime = datetime.datetime.now().strftime("%Y-%m-%d_%H-%M-%S")
relative_output_path = current_datetime

directory_creation_timeout = 3000  # Timeout for directory creation in seconds
image_generation_timeout = 30000  # Timeout for image generation in seconds

def get_checkpoint_number(filename):
    match = re.search(r'checkpoint-(\d+)', filename)
    if match:
        return int(match.group(1))
    match = re.search(r'/checkpoint-(\d+)/', filename)
    if match:
        return int(match.group(1))
    return None

def get_most_recent_output_folder(base_dir):
    folders = [f for f in os.listdir(base_dir) if os.path.isdir(os.path.join(base_dir, f))]
    if not folders:
        return None
    return max(folders, key=lambda f: os.path.getctime(os.path.join(base_dir, f)))

def process_safetensors(safetensor_dir, workflow):
    print(f"Scanning directory: {safetensor_dir}")

    last_dir = os.path.basename(os.path.normpath(safetensor_dir))

    all_items = os.listdir(safetensor_dir)

    safetensor_items = [f for f in all_items if f.endswith('.safetensors')]

    safetensor_items.sort(key=lambda x: int(x.split('-')[1].split('.')[0]))

    print(f"Found items: {safetensor_items}")

    for item in safetensor_items:
        unet_name = f"{last_dir}/{item}"

        print(f"Processing: {unet_name}")

        unet_loader_node = workflow["273"]
        unet_loader_node["inputs"]["unet_name"] = unet_name

        checkpoint_num = item.split('-')[1].split('.')[0]

        save_image = workflow["275"]
        filename_prefix = f"checkpoint-{checkpoint_num}"
        save_image["inputs"]["output_path"] = relative_output_path
        save_image["inputs"]["filename_prefix"] = filename_prefix

        success = queue_prompt(workflow)
        if not success:
            print(f"Failed to queue prompt for checkpoint {checkpoint_num}")
        else:
            print(f"Successfully queued prompt for checkpoint {checkpoint_num}")

    if not safetensor_items:
        print("No .safetensors files found in the directory.")

    return len(safetensor_items)

def create_image_strip(safetensor_dir, image_folder, output_filename):
    safetensor_files = [f for f in os.listdir(safetensor_dir) if f.endswith('.safetensors')]
    safetensor_files.sort(key=get_checkpoint_number)
    checkpoints = [get_checkpoint_number(f) for f in safetensor_files if get_checkpoint_number(f) is not None]

    images = []
    for checkpoint in checkpoints:
        filename = f"checkpoint-{checkpoint}_0001.png"
        filepath = os.path.join(image_folder, filename)
        if os.path.exists(filepath):
            try:
                img = Image.open(filepath)
                images.append(img)
            except IOError as e:
                print(f"Cannot open image: {filepath}")
                print(f"Error: {e}")

    if not images:
        print("No valid images found.")
        return

    img_width, img_height = images[0].size
    strip_width = img_width * len(images)
    label_height = 50  # Space for labels
    strip_height = img_height + label_height

    strip_image = Image.new('RGB', (strip_width, strip_height), 'white')
    draw = ImageDraw.Draw(strip_image)
    font = ImageFont.truetype(font_ttf_path, 20)

    for i, (img, checkpoint) in enumerate(zip(images, checkpoints)):
        strip_image.paste(img, (i * img_width, label_height))

        label = f"checkpoint-{checkpoint}"
        label_width = draw.textlength(label, font=font)
        label_x = i * img_width + (img_width - label_width) // 2
        draw.text((label_x, 10), label, fill="black", font=font)

    strip_image.save(output_filename)
    print(f"Image strip saved to: {output_filename}")

def queue_prompt(workflow):
    p = {"prompt": workflow}
    data = json.dumps(p).encode('utf-8')
    req = request.Request(api_endpoint, data=data, headers={'Content-Type': 'application/json'})
    try:
        with request.urlopen(req) as response:
            print(f"API request successful. Status code: {response.getcode()}")
            return True
    except urllib.error.URLError as e:
        if hasattr(e, 'reason'):
            print(f"Failed to reach the server. Reason: {e.reason}")
        elif hasattr(e, 'code'):
            print(f"The server couldn't fulfill the request. Error code: {e.code}")
        print(f"API endpoint: {api_endpoint}")
    except Exception as e:
        print(f"An error occurred: {str(e)}")
    return False

def wait_for_directory_creation(directory, timeout):
    print(f"Waiting for directory {directory} to be created...")
    start_time = time.time()
    while time.time() - start_time < timeout:
        if os.path.exists(directory):
            print(f"Directory {directory} found.")
            return True
        time.sleep(5)  # Check every 5 seconds
    print(f"Timeout waiting for directory {directory} to be created.")
    return False

def wait_for_images(image_folder, expected_count, timeout):
    print("Waiting for images to be generated...")
    start_time = time.time()
    while time.time() - start_time < timeout:
        if os.path.exists(image_folder):
            image_files = [f for f in os.listdir(image_folder) if f.endswith('.png')]
            if len(image_files) >= expected_count:
                print(f"Found all {expected_count} images.")
                return True
        time.sleep(5)  # Check every 5 seconds
    print("Timeout waiting for images to be generated.")
    return False

if __name__ == "__main__":
    safetensor_dir = finetune_dir
    print(f"Finetune directory: {safetensor_dir}")

    # Generate images
    expected_image_count = process_safetensors(safetensor_dir, workflow)

    absolute_output_path = os.path.join(comfyui_output_dir, current_datetime)
    print(f"Absolute output path: {absolute_output_path}")

    # Create the image strip
    if wait_for_directory_creation(absolute_output_path, directory_creation_timeout):
        print(f"Expected image count: {expected_image_count}")
        if wait_for_images(absolute_output_path, expected_image_count, image_generation_timeout):
            output_strip_filename = os.path.join(absolute_output_path, "output_image_strip.png")
            create_image_strip(safetensor_dir, absolute_output_path, output_strip_filename)
        else:
            print("Failed to generate all images in time.")
    else:
print("Output directory was not created.")- サンプルの .env ファイル
API_WORKFLOW_DIR=/weka2/home-yeo/workflows
COMFYUI_OUTPUT_DIR = /weka2/home-yeo/ComfyUI/output/
FINETUNE_DIR=/admin/home-yeo/workspace/ComfyUI/models/unet/simpletuner_09
API_WORKFLOW_FILE=SD3_SINGLE_BASIC_API_02.json
API_ENDPOINT=127.0.0.1:8188
FONT_TTF_PATH=/weka2/home-yeo/fonts/arial.ttf
BOLD_FONT_TTF_PATH=/weka2/home-yeo/fonts/arialbd.ttf
結局、私は終了間際のステップ`20,800`でチェックポイントを選びました。
ギャラリー
最後にいくつか例を挙げていきます。


LoRA のトレーニング
(より軽量な)LoRAのトレーニングを試したい場合、これは私が使ったconfigで、まあまあの結果が得られました。完全な微調整の方が品質的には良いようです。LoRAの rank と alpha は export TRAINER_EXTRA_ARGS 内で設定できます。
★訳注:カスタムSD3 LoRA `config.env`をご参照ください
近日発表予定のモデルのチラ見せ
詳細はまだお伝えできませんが、近日発表予定のモデルの出力のスニークピーク(チラ見せ)です
a close up three fourth perspective portrait view of a young woman with dark hair and dark blue eyes, looking upwards and to the left, head tilted slightly downwards and to the left, exposed forehead, wearing a nun habit with white lining, wearing a white collared shirt, barely visible ear, cropped, a dark brown background
黒髪で濃い青の瞳をした若い女性のクローズアップ三四透視図。上を見て左を向き、頭はやや下向きで左に傾いており、額は露出しています。白い裏地のついた修道服に身を包み、白い襟付きシャツを着ており、耳はかろうじて見えています。

a front wide view of a small cyberpunk city with futuristic skyscrapers with gold rooftops situated on the side of a cliff overlooking an ocean, day time view with green tones, some boats floating in the foreground on top of reflective orange water, large mechanical robot structure reaching high above the clouds in the far background, atmospheric perspective, teal sky
海を見下ろす崖の中腹に建つ、金色の屋根を持つ近未来的な高層ビルが建ち並ぶ小さなサイバーパンク都市の正面からのワイドビュー、緑を基調とした日中の眺め、反射するオレンジ色の水の上に浮かぶ手前のいくつかのボート、遠景の雲の上まで届く大きな機械仕掛けのロボット構造、大気遠近法、ティール色の空

a medium view of a city square alongside a river, two large red boats in the foreground with cargo on them, two people in a smaller boat in the bottom right cruising along, reflective dark yellow water in the river, a congregation of people walking along the street parallel to the river in the midground, a dark white palazzo building with dark white tower on the right with red tones, golden hour, red and yellow flag in the top left foreground, light blue flag with yellow accents in the right midground, aerial perspective
川沿いの広場の中景、前景に荷を載せた2隻の赤い大型ボート、右下の小さなボートに乗った2人のクルージング、反射する濃い黄色の川の水、中景に川と平行する通りを歩く人々、右手に赤を基調とした濃い白の塔を持つ濃い白のパラッツォの建物、ゴールデンタイム、左上の前景に赤と黄色の旗、右の中景に黄色のアクセントのある水色の旗、空からの視点。

近日公開予定のモデルのスニークピーク まだあまり多くの詳細はお伝えできませんが、近日公開予定のモデルの1人からの出力のスニークピークです:黒髪でダークブルーの目をした若い女性のクローズアップ3/4遠近法のポートレートビュー、上向きで左を向き、頭はやや下向きで左に傾いており、額が露出しています、白い裏地の付いた修道女の習慣を身に着け、白い襟付きシャツを着ており、かろうじて耳が見えています、トリミング済み、ダークブラウンの背景。
おまけ: オートキャプション
データセットが準備できれば、上記の手順でモデルのファインチューニングを始めることができますが、結果はデータセットによって大きく異なります。正しくキャプションが付けられた画像を見つけるのは、かなり難しいことです。手作業でキャプションをつけるのは、かなり面倒で、ミスが起こりやすい作業です。ですから、何らかの形で自動化されたソリューションを試してみるのは理にかなっています。
https://github.com/THUDM/CogVLM
実際、SD3自身も、キャプションを生成するための事前学習でCogVLM(ビジョン言語モデル)を使用しました。しかし、このモデルを正しく使用するには、多くのVRAM、大規模なデータセット、複雑なワークフローが必要です。そこで、このブログポストでは、小規模なコミュニティの微調整にもう少し適したものに焦点を当てます:JoyCaptionです。JoyCaptionは、新しいモデルの微調整を行うために、コミュニティのメンバーによって開発された積極的なキャプションモデルです。
https://huggingface.co/spaces/fancyfeast/joy-caption-pre-alpha
アクセシブルなキャプション・インターフェースで動かすには、TagGUIを使います。このページの指示に従うことで、GUIをインストールし、画像を処理する準備ができます。ただし、いくつか重要なポイントがあります:オートキャプションは(まだ)完全ではないので、自動的な解決策によって、画像の一部が適切にキャプション付けされていないことに気づくかもしれません。このようなミスや問題は、多くのデータを持っていれば多少はかき消すことができますが、ほとんどの趣味人にとっては難しいことでしょう。この場合、何が間違っているのかを理解し、それを反復するために、キャプションを手動で検査する必要があるかもしれない。覚えておいてほしいのは、不正確なキャプションでトレーニングしても、迅速な遵守は期待できないので、この設定に費やす時間は非常に貴重だということです。ここでの反復時間を短縮するために、完全な微調整の前に、データを使っていくつかのLoRAを訓練するとよいでしょう。頑張ってください!
https://github.com/doloreshaze337/taggui
kasukanra@GitHubリポジトリ
https://github.com/kasukanra?tab=repositories
たくさんのツールが置かれています。
原作をご提供いただいたYeo Wangさん、ありがとうございました!
https://note.com/aicu/m/m6000f560d1db

Originally published at https://note.com on Sept 14, 2024.
Comments